Top 10 JavaScript Projects for Beginners

If you are a beginner, starting your journey in javascript, or someone looking to get a little practice with JavaScript to construct your portfolio? You are at the right place!
Introduction
Now, the best way to learn JavaScript – or any other programming language – is to invest your time and effort to build tons of projects. Getting started with JavaScript fundamentals means using those JavaScript skills to construct JavaScript projects.
To assist you to get started, I’ve put together a list of 10 beginner-level Javascript project ideas you may begin with right now.
Browse thru the listing and click via to any JavaScript project you discover fascinating. Also, If you find a project challenging, all these projects are along with their source code to help you to build your project in a guided way.
Let’s get started!
Javascript beginner Projects
Digital Clock
Building a digital clock using JavaScript is an incredible assignment for a beginner to apprehend the basic standards of JavaScript. Creating this can help you know how to access the DOM, add pastimes to them, and much more.
This is what our project will look like:
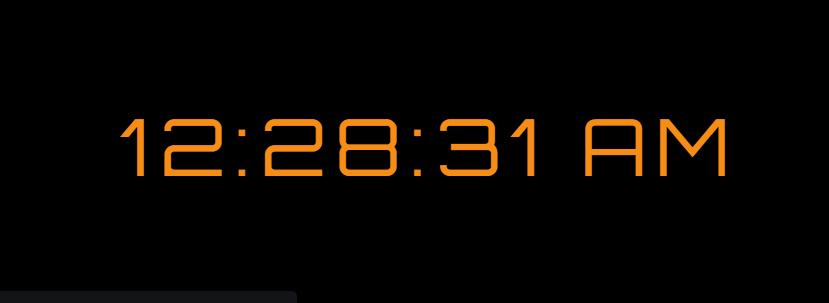
Take a look at the live project here – https://javascript-digital-clock.surge.sh/
After completing this project you’ll know how to create variables, access DOM and add properties to DOM.
Let’s start coding!
HTML
<div id="MyClockDisplay" class="clock" onload="showTime()"></div>Code language: HTML, XML (xml)CSS
body {
    background: black;
}

.clock {
    position: absolute;
    top: 50%;
    left: 50%;
    transform: translateX(-50%) translateY(-50%);
    color: #f78d14;
    font-size: 60px;
    font-family: Orbitron;
    letter-spacing: 7px;
}Code language: CSS (css)
Javascript
function showTime(){
    var date = new Date();
    var h = date.getHours(); // 0 - 23
    var m = date.getMinutes(); // 0 - 59
    var s = date.getSeconds(); // 0 - 59
    var session = "AM";

    if(h == 0){
        h = 12;
    }

    if(h > 12){
        h = h - 12;
        session = "PM";
    }

    h = (h < 10) ? "0" + h : h;
    m = (m < 10) ? "0" + m : m;
    s = (s < 10) ? "0" + s : s;

    var time = h + ":" + m + ":" + s + " " + session;
    document.getElementById("MyClockDisplay").innerText = time;
    document.getElementById("MyClockDisplay").textContent = time;

    setTimeout(showTime, 1000);

}
showTime();Code language: JavaScript (javascript)
Congrats, we’re done with our first project.
JavaScript stopwatch
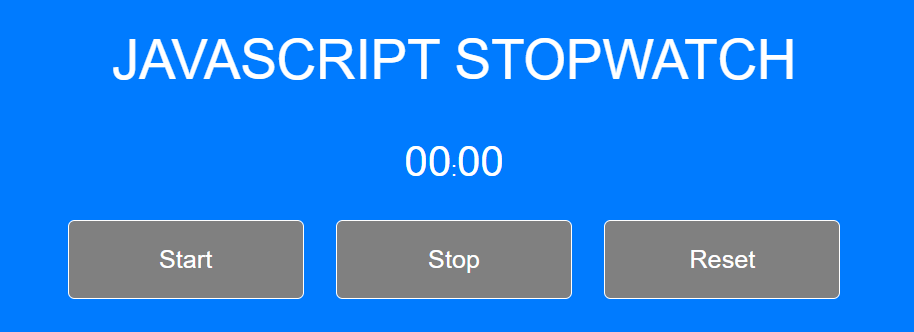
The second project on the list is a javascript stopwatch. Coding a JavaScript stopwatch is a small bigger level project you could construct fast and easily. The app has three buttons start, stop and reset.
Our final project will look like this:
HTML
<div class="wrapper">
<h2>Vanilla JavaScript Stopwatch</h2>
<p><span id="seconds">00</span>:<span id="tens">00</span></p>
<button id="button-start">Start</button>
<button id="button-stop">Stop</button>
<button id="button-reset">Reset</button>
</div>
Code language: HTML, XML (xml)
CSS
/* Variabes */
$orange:#007bff;
$grey:#03090a;
$white: #fff;
$base-color:$orange ;


/* Mixin's */
@mixin transition {
-webkit-transition: all 0.5s ease-in-out;
-moz-transition: all 0.5s ease-in-out;
transition: all 0.5s ease-in-out;
}
@mixin corners ($radius) {
-moz-border-radius: $radius;
-webkit-border-radius: $radius;
border-radius: $radius;
-khtml-border-radius: $radius;
}

body {
background:$base-color;
font-family: "HelveticaNeue-Light", "Helvetica Neue Light", "Helvetica Neue", Helvetica, Arial, "Lucida Grande", sans-serif;
height:100%;
}

.wrapper {
width: 800px;
margin: 30px auto;
color:$white;
text-align:center;
}

h1, h2, h3 {
  font-family: 'Roboto', sans-serif;
  font-weight: 100;
  font-size: 2.6em;
  text-transform: uppercase;
}

#seconds, #tens{
  font-size:2em;
}

button{
@include corners (5px);
background:$base-color;
color:$white;
border: solid 1px $white;
text-decoration:none;
cursor:pointer;
font-size:1.2em;
padding:18px 10px;
width:180px;
margin: 10px;
 outline: none;
  &:hover{
	@include transition;
	background:$white;
	border: solid 1px $white;
	color:$base-color;
	}
}
Code language: CSS (css)
Javascript
window.onload = function () {

  var seconds = 00;
  var tens = 00;
  var appendTens = document.getElementById("tens")
  var appendSeconds = document.getElementById("seconds")
  var buttonStart = document.getElementById('button-start');
  var buttonStop = document.getElementById('button-stop');
  var buttonReset = document.getElementById('button-reset');
  var Interval ;

  buttonStart.onclick = function() {

    clearInterval(Interval);
     Interval = setInterval(startTimer, 10);
  }

    buttonStop.onclick = function() {
       clearInterval(Interval);
  }


  buttonReset.onclick = function() {
     clearInterval(Interval);
    tens = "00";
  	seconds = "00";
    appendTens.innerHTML = tens;
  	appendSeconds.innerHTML = seconds;
  }


  function startTimer () {
    tens++;

    if(tens <= 9){
      appendTens.innerHTML = "0" + tens;
    }

    if (tens > 9){
      appendTens.innerHTML = tens;

    }

    if (tens > 99) {
      console.log("seconds");
      seconds++;
      appendSeconds.innerHTML = "0" + seconds;
      tens = 0;
      appendTens.innerHTML = "0" + 0;
    }

    if (seconds > 9){
      appendSeconds.innerHTML = seconds;
    }

  }

}Code language: JavaScript (javascript)
Congrats, we have completed our second project.
Multiplication game
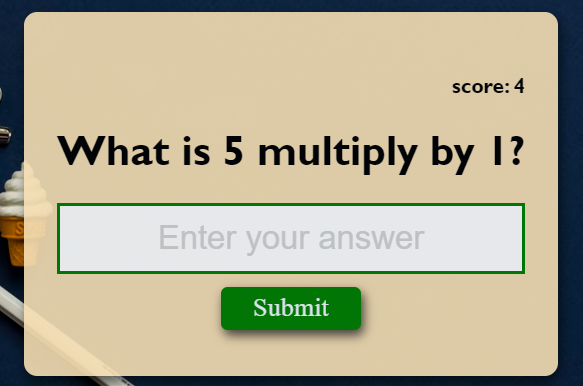
Let’s build our third project, which is a multiplication game. The app is simple and requires only basic knowledge of HTML and CSS. It just pop-up a multiplication question and we have to just input our answer and the game rewards us with a score based on our answer.
Before getting started, this is how our project will look:
HTML
<body>
    <form class="form" id="form">
        <h4 class="score" id="score">score: 0</h4>
        <h1 id="question">What is 1 multiply by 2?</h1>
        <input type="text" class="input" id="input" placeholder="Enter your answer" autofocus autocomplete="off">
        <button type="submit" class="btn">Submit</button>
    </form>
    <script src="index.js"></script>
</body>Code language: HTML, XML (xml)
CSS
body{
    margin: 0;
    display: flex;
    justify-content: center;
    height: 100vh;
    align-items: center;
    text-align: center;
    background: url("https://images.unsplash.com/photo-1497864149936-d3163f0c0f4b?ixlib=rb-1.2.1&ixid=MnwxMjA3fDB8MHxwaG90by1wYWdlfHx8fGVufDB8fHx8&auto=format&fit=crop&w=1169&q=80");
    font-family: 'Gill Sans', 'Gill Sans MT', Calibri, 'Trebuchet MS', sans-serif;
    background-size: cover;
}

.form{
    background-color: wheat;
    padding: 25px;
    opacity: .9;
    box-shadow: 2px 4px 8px rgba(0, 0, 0, .6);
    border-radius: 10px;
    margin: 10px;
}

.input{
    display: block;
    width: 100%;
    /* margin-bottom: 5px; */
    box-sizing: border-box;
    font-size: 25px;
    border: solid green;
    text-align: center;
    padding: 10px;
    color: green;
}

.input::placeholder{
    color: lightgrey;
    font-family: Arial, Helvetica, sans-serif;
}

.btn{
    background-color: green;
    cursor: pointer;
    border: none;
    color: aliceblue;
    width: 30%;
    padding: 5px;
    box-sizing: border-box;
    font-size: 20px;
    font-family: 'Times New Roman', Times, serif;
    border-radius: 5px;
    margin: 10px;
    box-shadow: 2px 4px 8px rgba(0, 0, 0, .7);
}

.btn:hover{
    filter: brightness(.8);
}

.score{
    text-align: right;

}Code language: CSS (css)
Javascript
const num1 = Math.ceil(Math.random()*10);
const num2 = Math.ceil(Math.random()*10);

const quesEl = document.getElementById("question");
const inputEl = document.getElementById("input");
const formEl = document.getElementById("form");
const scoreEl = document.getElementById("score");

let score = JSON.parse(localStorage.getItem("score"));

if(!score){
    score = 0;
}

scoreEl.innerText = `score: ${score}`;
quesEl.innerText = `What is ${num1} multiply by ${num2}?`;

const answer = num1*num2;

formEl.addEventListener("submit", ()=>{
    const userAnswer = +inputEl.value;
    if (userAnswer === answer){
        score++;
        updateLocalStorage();
    } else{
        score--;
        updateLocalStorage();
    }
});

function updateLocalStorage(){
    localStorage.setItem("score", JSON.stringify(score));
}Code language: JavaScript (javascript)
All done, our project is ready!
Real-time character counter
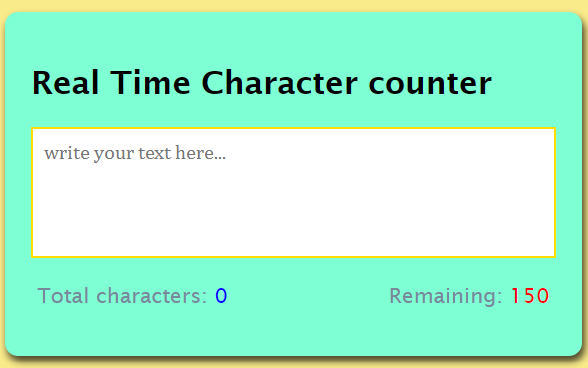
Fourth on our list is a real-time character counter application using javascript. This character counter app will have a simple textarea where we can write our text until the character limit. It also shows the total and remaining character count. When you enter some text, it’ll show the number of characters and words that you’ve entered.
This how this character counter app looks like:
Live project here
Let’s code it!
HTML
<div class="container">
        <h2>Real Time Character counter</h2>
        <textarea id="textarea" class="textarea" placeholder="write your text here..." maxlength="150"></textarea>
        <div class="counter-container">
            <p>Total characters: <span class="total-counter" id="total-counter"></span></p>
            <p>Remaining: <span class="remaining-counter" id="remaining-counter"></span></p>
</div>Code language: HTML, XML (xml)
CSS
body{
    margin: 0px;
    display: flex;
    justify-content: center;
    height: 100vh;
    align-items: center;
    background-color: #faeb8a;
    font-family: 'Lucida Sans', 'Lucida Sans Regular', 'Lucida Grande', 'Lucida Sans Unicode', Geneva, Verdana, sans-serif;
}

.container{
    background-color: aquamarine;
    width: 400px;
    padding: 20px;
    margin: 15px;
    border-radius: 10px;
    box-shadow: 2px 4px 6px rgba(0, 0, 0, .7);
}

.textarea{
    resize: none;
    width: 100%;
    height: 100px;
    font-size: 15px;
    font-family: Cambria, Cochin, Georgia, Times, 'Times New Roman', serif;
    padding: 8px;
    box-sizing: border-box;
    border: solid 2px rgb(255, 221, 0);
}

.counter-container{
    display: flex;
    justify-content: space-between;
    padding: 0 5px;
}

.counter-container p{
    font-size: 16px;
    color: lightslategrey;
}

.total-counter{
    color: blue;
}

.remaining-counter{
    color: red;
}Code language: CSS (css)
Javascript
const textareaEl = document.getElementById("textarea");
const totalcounterEl = document.getElementById("total-counter");
const reaminingcounterEl = document.getElementById("remaining-counter");

textareaEl.addEventListener("keyup", ()=> {
    updateCounter()
});

updateCounter();

function updateCounter(){
    totalcounterEl.innerText = textareaEl.value.length;
    reaminingcounterEl.innerText = textareaEl.getAttribute("maxLength") - textareaEl.value.length;
}Code language: JavaScript (javascript)
That’s it, our app is completed!
Javascript Color Generator
Colors are a vital part of the design. There are complete websites built around growing gradients and color shade palettes, and that is what we are going to build in this project.
In this project, I’ll show you a way to generate a random color in JavaScript. Maybe you will locate the random coloration generator beneficial while developing a website that shall we users to create stylish posters or shape elements!
Final view of the project:
Live project here
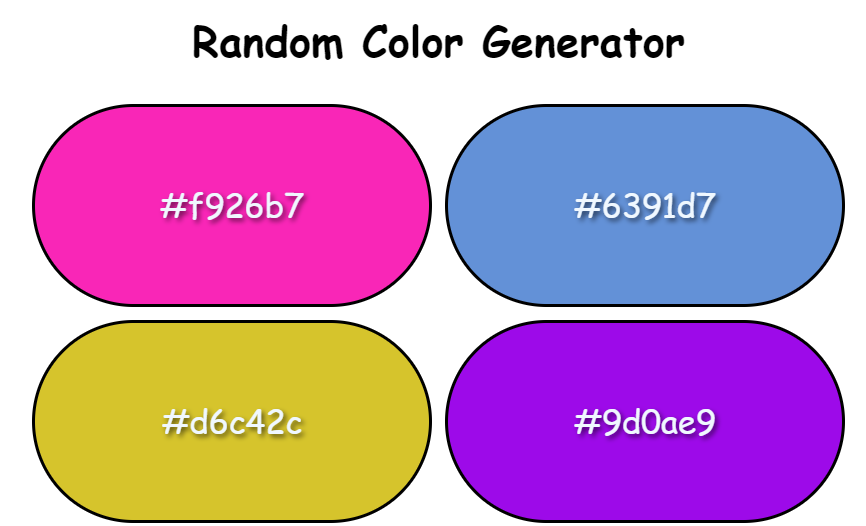
Let’s start coding.
HTML
<h1>Random Color Generator</h1>
    <div class="container">
</div>Code language: HTML, XML (xml)
CSS
body{
    margin: 0;
    font-family: cursive;
}

h1{
    text-align: center;
}

.container{
    display: flex;
    flex-wrap: wrap;
    justify-content: center;
}

.color-container{
    background-color: orange;
    width: 300px;
    height: 150px;
    color: aliceblue;
    margin: 5px;
    display: flex;
    justify-content: center;
    align-items: center;
    font-size: 25px;
    text-shadow: 2px 2px 4px rgba(0,0,0, 0.6);
    border: solid black;
    border-radius: 200px;
}Code language: CSS (css)
Javascript
const containerEl = document.querySelector(".container");

for (let index = 0; index < 30; index++) {
    const colorContainerEl = document.createElement("div");
    colorContainerEl.classList.add("color-container");
    containerEl.appendChild(colorContainerEl);
}

const colorContainerEls = document.querySelectorAll(".color-container");

function generateColor(){
    colorContainerEls.forEach((colorContainerEl) => {
        const newColorCode = randomColor();
        colorContainerEl.style.backgroundColor =  "#" + newColorCode;
        colorContainerEl.innerText = "#" + newColorCode;
    })
}

generateColor();
function randomColor(){
    const chars = "0123456789abcdef";
    const colorCodeLength = 6;
    let colorCode = "";
    for (let index = 0; index < colorCodeLength; index++) {
        const randomNum = Math.floor(Math.random() * chars.length);

        colorCode += chars.substring(randomNum, randomNum + 1);
    }
    return colorCode;
}Code language: JavaScript (javascript)
Our color palette is ready, start generating random colors for your designs!
Almost every one of us has seen ripple buttons on various websites, but have you ever wondered how these effect work or how you can make a simple button attractive using color animation on your application? While in this project you’ll see the same. The button ripple effect is an easy and simple project for beginners having only basic knowledge of javascript.
This will be our project outcome. here
Let’s design our button.
HTML
<a href="#" class="btn"><span>Button</span></a>Code language: HTML, XML (xml)CSS
body{
    margin: 0;
    display: flex;
    justify-content: center;
    height: 100vh;
    align-items: center;
    background-color: antiquewhite;
    font-family: 'Franklin Gothic Medium', 'Arial Narrow', Arial, sans-serif;
}

.btn{
    background-color: burlywood;
    padding: 20px 40px;
    border-radius: 6px;
    box-shadow: 2px 4px 6px rgba(0, 0, 0, .7);
    text-decoration: none;
    color: black;
    position: relative;
    overflow: hidden;
}

.btn span{
    position: relative;
    z-index: 1;
}

.btn::before{
    content: "";
    position: absolute;
    background-color: orangered;
    width: 0px;
    height: 0px;
    left: var(--xPos);
    top: var(--yPos);
    transform: translate(-50%, -50%);
    border-radius: 50%;
    transition: width 0.5s, height 0.5s;
}

.btn:hover::before{
    width:300px;
    height: 300px;
} Code language: CSS (css)
Javascript
const btnEl = document.querySelector(".btn");

btnEl.addEventListener("mouseover", (event)=>{
    const x = (event.pageX - btnEl.offsetLeft);
    const y = (event.pageY - btnEl.offsetTop);

    btnEl.style.setProperty("--xPos", x + "px");
    btnEl.style,setProperty("--yPos", y + "px");
});Code language: JavaScript (javascript)
All done, we have added a ripple effect to our button.
Dark mode toggle
Who doesn’t what a dark/light mode for their website or application? This is a simple beginner-level Dark more toggle project which is helpful in modern websites. It makes the website fascinating and flexible for users. This project will boost your skills and knowledge of javascript.
Live project here


Let’s build it!
HTML
<input type="checkbox" class="input" id="dark-mode">
    <label for="dark-mode" class="label">
        <div class="circle">    </div>
    </label>Code language: HTML, XML (xml)
CSS
body{
    width: 100%;
    margin: 10px -10px;
    display: flex;
    justify-content: right;
    /* align-items: center; */
    height: 100vh;
    transition: .4s;
}

.input{
    visibility: hidden;
}

.label{
    position: absolute;
    width: 80px;
    height: 40px;
    background-color: rgb(183, 179, 179);
    border-radius: 20px;
}

.circle{
    width: 34px;
    background-color: white;
    height: 34px;
    border-radius: 50px;
    top: 3px;
    position: absolute;
    left: 3px;
    cursor: pointer;
    animation: toggleOff 0.4s linear forwards;
}

.input:checked + .label{
    background-color: white;
}

.input:checked + .label .circle{
    animation: toggleOn 0.4s linear forwards;
    background-color: black;
}

@keyframes toggleOn {
    0%{
        transform: translateX(0);
    }
    100%{
        transform: translateX(40px);
    }
}

@keyframes toggleOff {
    0%{
        transform: translateX(40px);
    }
    100%{
        transform: translateX(0);
    }
}Code language: CSS (css)
Javascript
const inputEl = document.querySelector(".input");

const bodyEl = document.querySelector("body");

inputEl.checked = JSON.parse(localStorage.getItem("mode"));
updateBody()

function updateBody() {
    if(inputEl.checked){
        bodyEl.style.background = "black";
    } else {
        bodyEl.style.background = "white";
    }
}

inputEl.addEventListener("input", ()=>{
    updateBody()
    updateLocalStorage()
})

function updateLocalStorage(){
    localStorage.setItem("mode",JSON.stringify(inputEl.checked))
}Code language: JavaScript (javascript)
Enough coding, let’s play with the toggle for a while.
Auto text effect animation
The next project on the list is an auto-text effect animation. This is a bigger-level project, but you can work around it and can use it for various purposes. Wheater building a portfolio website or an introductory or pop-up page, the skills you will learn in this project will highly help you and will add weight to your fundamentals and design skills.
Checkout the project here
Let’s code it!
HTML
<div class="container"></div>Code language: HTML, XML (xml)CSS
@import url('https://fonts.googleapis.com/css2?family=Roboto:ital,wght@0,300;1,100&display=swap');

body{
    margin: 0%;
    display: flex;
    justify-content: center;
    align-items: center;
    height: 100vh;
    background-color: aqua;
    font-family: 'Courier New', Courier, monospace;

}Code language: CSS (css)
Javascript
const containerEl = document.querySelector(".container")
const careers = ["Developer","Freelenser","Youtuber","Insrructor"]

let careeIndex = 0;

let characterIndex = 0;

updateText()

function updateText(){
    characterIndex++;
    containerEl.innerHTML = `
<h1>I am ${careers[careeIndex].slice(0,1) === "I" ? "an" : "a"} ${careers[careeIndex].slice(0,characterIndex)}</h1>
`;

if (characterIndex === careers[careeIndex].length){
    careeIndex++;
    characterIndex = 0;
}

if(careeIndex === careers.length){
    careeIndex = 0;
}

setTimeout(updateText, 150);
}
Code language: JavaScript (javascript)
Alright, add this to your project and make them look dynamic.
Random Image Generator
As a beginner, this is an easy and helpful project. It is a bigger friendly project, and basic knowledge of HTML and CSS is good to have. After completing this project you can easily generate any number of random images, also you can add a “Load More” button to generate some more random images.
Here is a look at the final project:
Live project link

Let’s build it.
HTML
<div class="image-container"></div>
<button class="btn">Load More</button>Code language: HTML, XML (xml)
CSS
body{
    margin: 0;
    display: flex;
    flex-direction: column;
    align-items: center;
    background-color: brown;
}

.image-container{
    text-align: center;
}

.image-container img{
    margin: 10px;
    border-radius: 10px;
    text-shadow: 2px 2px 4px rgba(0,0,0, 0.3);
    background-color: lavenderblush;
    width: 300px;
    height: 300px;
}

.btn{
    background-color: aqua;
    padding: 10px 20px;
    margin: 10px;
    border-radius: 10px;
    box-shadow: rgba(0,0,0, 0.3);
    color: black;
    cursor: pointer;
}

.btn:hover{
    opacity: .7;
}Code language: CSS (css)
Javascript
const imageContainerEl = document.querySelector(".image-container");
const btnEl = document.querySelector(".btn");

addNewImages()

btnEl.addEventListener("click",()=>{
    addNewImages()
})

function addNewImages(){
    for (let index = 0; index < 12; index++) {
        const newImgEl = document.createElement("img");
        newImgEl.src  = `https://picsum.photos/300?random=${Math.floor(Math.random() * 2000)}`;
        imageContainerEl.appendChild(newImgEl);
    }
}Code language: JavaScript (javascript)
Vo, start generating random images!
To-Do list
The last project on my javascript projects for beginners list is a To-Do list application. For a beginner, this is a must-do project. JavaScript is a remarkable programming language for building dynamic apps, and interactive lists where users can upload, edit, delete and move objects. It’s something we can’t do with just HTML and CSS. So, you can build your very own custom-coded to-do list using JavaScript. Start small and create a single listing where you may add and delete items.
This is what a simple javascript to-do list looks like:
live project link
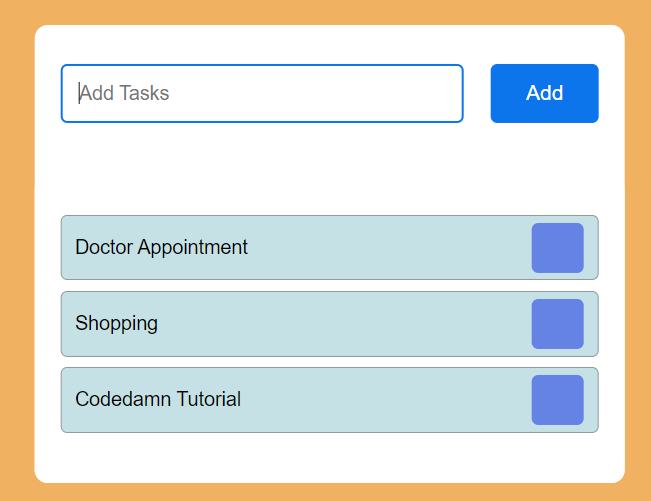
Let’s code our final project on the list.
HTML
<div class="container">
    <div id="newtask">
        <input type="text" placeholder="Add Tasks">
        <button id="push">Add</button>
    </div>
    <div id="tasks"></div>

</div>Code language: HTML, XML (xml)
CSS
*,
*:before,
*:after{
    padding: 0;
    margin: 0;
    box-sizing: border-box;
}
body{
    height: 100vh;
    background: #066acd;
}
.container{c
    width: 40%;
    top: 50%;
    left: 50%;
    background: white;
    border-radius: 10px;
    min-width: 450px;
    position: absolute;
    min-height: 100px;
    transform: translate(-50%,-50%);
}
#newtask{
    position: relative;
    padding: 30px 20px;
}
#newtask input{
    width: 75%;
    height: 45px;
    padding: 12px;
    color: #111111;
    font-weight: 500;
    position: relative;
    border-radius: 5px;
    font-family: 'Poppins',sans-serif;
    font-size: 15px;
    border: 2px solid #d1d3d4;
}

#newtask input:focus{
    outline: none;
    border-color: #0d75ec;
}
#newtask button{
    position: relative;
    float: right;
    font-weight: 500;
    font-size: 16px;
    background-color: #0d75ec;
    border: none;
    color: #ffffff;
    cursor: pointer;
    outline: none;
    width: 20%;
    height: 45px;
    border-radius: 5px;
    font-family: 'Poppins',sans-serif;
}
#tasks{
    border-radius: 10px;
    width: 100%;
    position: relative;
    background-color: #ffffff;
    padding: 30px 20px;
    margin-top: 10px;
}

.task{
    border-radius: 5px;
    align-items: center;
    justify-content: space-between;
    border: 1px solid #939697;
    cursor: pointer;
    background-color: #c5e1e6;
    height: 50px;
    margin-bottom: 8px;
    padding: 5px 10px;
    display: flex;
}
.task span{
    font-family: 'Poppins',sans-serif;
    font-size: 15px;
    font-weight: 400;
}
.task button{
    background-color: #6583e5;
    color: #ffffff;
    border: none;
    cursor: pointer;
    outline: none;
    height: 100%;
    width: 40px;
    border-radius: 5px;
}
Code language: CSS (css)
Javascript
document.querySelector('#push').onclick = function(){
    if(document.querySelector('#newtask input').value.length == 0){
        alert("Kindly Enter Task Name!!!!")
    }

    else{
        document.querySelector('#tasks').innerHTML += `
            <div class="task">
                <span id="taskname">
                    ${document.querySelector('#newtask input').value}
                </span>
                <button class="delete">
                    <i class="far fa-trash-alt"></i>
                </button>
            </div>
        `;

        var current_tasks = document.querySelectorAll(".delete");
        for(var i=0; i<current_tasks.length; i++){
            current_tasks[i].onclick = function(){
                this.parentNode.remove();
            }
        }
    }
}Code language: JavaScript (javascript)
Our, To-do application is ready, start using it!
As your abilities and skills enhance in javascript, you could add new capabilities to your to-do list app and make it more efficient.
Conclusion
That’s it! If you what to become a web developer, javascript is the heart language to learn and this could be your starting point. As said the earlier best way to learn javascript is by building projects. I have listed the top 10 projects for beginners you can start with and build their portfolio.
See ya! Thanks for reading.
Sharing is caring
Did you like what Prabal Gupta wrote? Thank them for their work by sharing it on social media.
No comments so far
Curious about this topic? Continue your journey with these coding courses:
733 students learning
Laurence Svekis
Practice JavaScript by building 10+ real projects

169 students learning
DINESH KUMAR REDDY
JavaScript from Zero to Hero with 5+ projects