Playwright Tutorial – How to do End To End Testing with Playwright?

Building an application from scratch or already working on a developed project, testing is part of the development to learn about your application behavior on different browsers, devices, and for various events.
This post will teach you how to do end-to-end testing with Playwright.
What is End To End Testing?
End-to-end testing, also known as E2E testing, is a methodology used to test applications to ensure the data flow and handle the events and inputs as expected.
This testing involves real-world scenarios, like
- Entering a name into the input field
- Remove the text from the input field
- Entering false information into the input field, like invalid email and address
- Clicking the login button, clicking the pay now button
What is Playwright?
The Playwright is an E2E testing tool with a powerful tooling system.
Using Playwright, you can run your tests on different browsers. It supports browsers like chrome, edge, firefox, opera, and safari.
You can install and run tests on any platform, and it is a platform-independent tool.
You can run Playwright on Windows, Linux, or macOS locally or run tests using CLI.
With the help of a Playwright, you can write E2E testing in your favorite language. It supports javascript, typescript, c++, python, .NET, and Java.
How is Playwright different from other testing frameworks?
Auto-wait:
The Playwright supports auto wait, which waits for the elements to get actionable/mounted, and then acts.
In contrast, other tools perform tests as soon as the code gets executed or need to attach separate async functions to perform tests only when elements are actionable.
Because of the Auto-wait, we no need to write timer functions separately.
Web-First Assertions:
The Playwright’s assertions are created primarily for the web, and Inspections automatically stop once the necessary conditions are met.
Tracing:
Using the Playwright tracing method, we can configure a retry test strategy if our tests fail unexpectedly.
We can capture screenshots and videos to remove the bugs.
No Limits:
Using Playwright, you can create multiple scenarios from different origins and contexts and run the tests simultaneously.
Trusted Events:
The Playwright uses real browser input indistinguishable from the actual users for the hover and dynamic input elements.
The Playwright can easily pierce the shadow DOM and allows entering into the frames without hassle.
Browser Context:
The Playwright creates a context when we run the test. Browser context is a brand new browser profile. Within a millisecond, a new browser context gets created.
Login Once:
When testing apps with authentication, you need to submit the details once, and it saves the authentication state and reuses during tests.
Using the authentication states, you can skip the repetitive login operation for each test.
Powerful Tooling:
The Playwright uses the codegen that generates the recording of actions and saves them into any programming language.
Using Playwright inspector, we can explore inspection logs, Inspect pages, and generate the selectors.
Traceviewer:
If our test fails using trace viewer, we can capture the recordings, execution screencast, live DOM snapshots, actions explorer, test source, and many more.
Above all, the features Playwright provides that’s what make it stand out from the other test frameworks.
How to install Playwright in React Project?
Installing Playwright is very easy, just like another npm package.
Step 1: Paste the below line inside your react project folder.
npm init playwright@latest --ctCode language: CSS (css)Step 2: You will get a prompt to select the framework. Choose React because we are going to test React apps first.
Step 3: Give your test folder name; otherwise, it will keep tests as the folder name.
Step 4: If you want to implement GitHub actions, you can add them. Otherwise, skips this step.
What gets installed?
When we install Playwright, it will add the following files inside our project folder.
playwright.config.js
package.json
package-lock.json
tests/
example.spect.js
tests-examples/
demo-todo-app.spec.js
Let’s see why we need those files,
Inside the playwright.config.js file, we add configuration to our Playwright, like modifying which browsers to include to run the tests.
If we run a test inside an existing project, the Playwright will add dependencies directly to the package.json file.
The tests folder default comes with a basic example test to help us start testing.
How to test React App Using Playwright?
For better understanding, I’m going to create a new react app, but you can download the starter files from the below GitHub repo.
Once you have downloaded it, open the folder inside the code editor.
You might want to install the missing packages, so open the terminal inside the project folder and run the below command.
npm installThe above command will install all the node modules.
Now start the react app by writing npm start. It should look like this.

Now it’s time for the testing. Let’s Go.
Install the Playwright inside your react app, as I have explained above, how to install it.
Inside the test folder, create a file called app.spec.js
You can safely delete the example.spec.js file.
The Playwright will consider .spec prefix files as test files. In easy words, Playwright detects .spec files as test files.
Let’s write our first test inside the app.spec.js file.
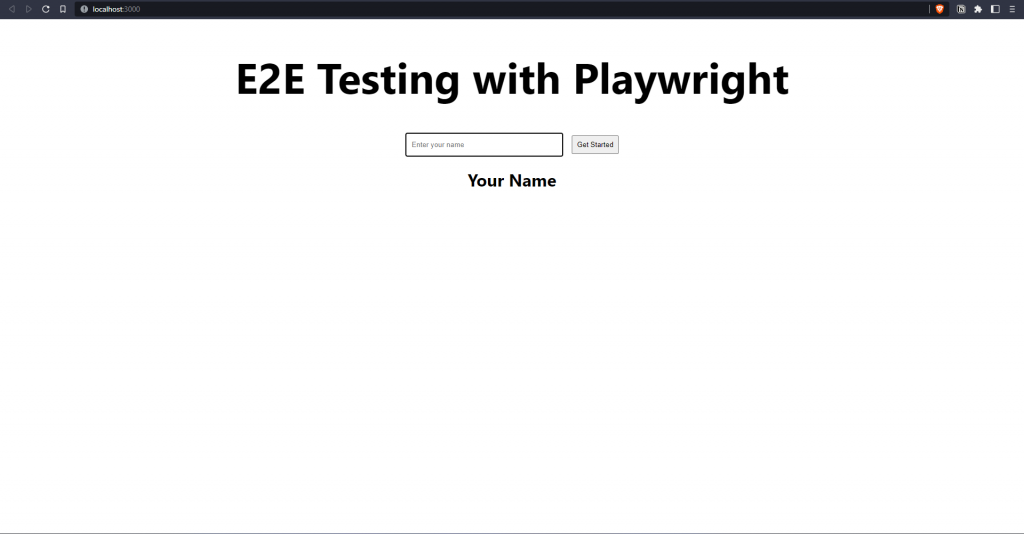
We will write a test where we ask Playwright to go to our homepage and take a screenshot of our homepage.
const { test, expect } = require("@playwright/test");

test("homepage has E2E Testing with Playwright", async ({ page }) => {
  // It will go to homepage of our React App
  await page.goto("http://localhost:3000/");
});
Code language: JavaScript (javascript)
To run the test inside the terminal, write npx playwright test
Write npx playwright show-report to get the report of our tests. It will open the html file inside the browser.
To take the screenshots of our tests, after writing the test, below the test code, ask the Playwright to take the screenshot.
Write the below line to take the screenshot.
const { test, expect } = require("@playwright/test");

test("homepage has E2E Testing with Playwright", async ({ page }) => {
  // It will go to homepage of our React App
  await page.goto("http://localhost:3000/");

  // Below line will take the screenshot after performing action
  await page.screenshot({ path: "screenshot/homepage.png" });

});
Code language: JavaScript (javascript)
It will save all our screenshots inside the folders provided in the path.
Testing React Components
Now let’s go ahead and test our React components.
Import the Input component, create a const variable with the name, and the const variable will store the component’s value.
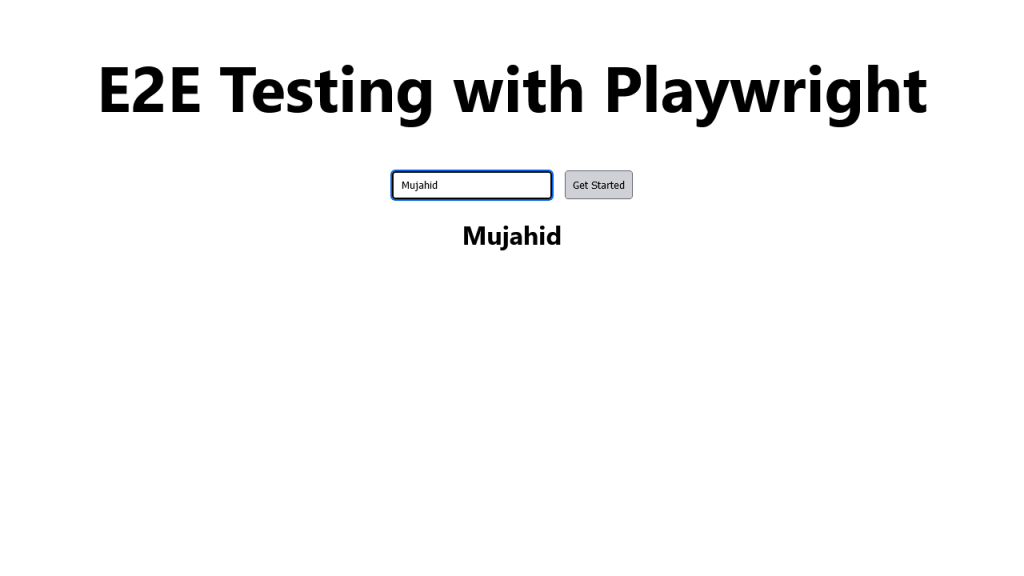
On the inputField component, we will use the fill method to fill the input field.
Let’s test. The input field has the value we passed inside the fill method. Write the below line of code to run this test, and take the screenshot after filling in the value.
// @ts-check

const { test, expect } = require("@playwright/test");
const { default: Input } = require("../src/components/Input");

test("homepage has E2E Testing with Playwright", async ({ page }) => {
  await page.goto("http://localhost:3000/");
  await page.screenshot({ path: "screenshot/homepage.png" });
  // Expect a title "to contain" a substring.
  await expect(page).toHaveTitle(/React App/);

  // create a locator
  const getStarted = page.locator("text=Get Started");

  // Expect an attribute "to be strictly equal" to the value.
  await expect(getStarted).toHaveAttribute("href", "http://localhost:3000");

  // Click the get started link.
  await getStarted.click();

  // Get input field
  const inputField = await page.locator("id=nameInput");
  // Fill the input field
  await inputField.fill("codedamn");
  // Check the input field has got the value that is passed inside fill method
  await expect(inputField).toHaveValue("codedamn");
  // Take the screenshot
  await page.screenshot({ path: "screenshot/inputField.png" });
});
Code language: JavaScript (javascript)
Open the screenshot folder to check that the input field has the value passed inside the fill method.

Summary
That’s it, and I hope you got the idea of how to test the React app and its components. There are other methods you can try inside your react app, and below I will list resource links for all the methods and web assertions.
Resources Link
Sharing is caring
Did you like what Mujahid Khan H A wrote? Thank them for their work by sharing it on social media.
No comments so far
Curious about this topic? Continue your journey with these coding courses:

