Codedamn solidity playground

Looking for a place where you can create, compile and deploy your solidity smart contract in one place ? Welcome to Codedamn solidity playground
At Codedamn we provide you with solidity playground with the help of which you can create, compile and deploy your smart contracts without leaving your browser. No installation, nothing.
For the solidity playground, we use hardhat tool. To know more about it – https://hardhat.org/
Steps to use the solidity playground –
Step – 1 : Visit – https://codedamn.com/playgrounds . You will see an interface like this.

Step – 2 : Click on Create A Playground button.

Step – 3 : Select Solidity from the dropdown and give name to your solidity playground in Playground Title.

Step – 4 : Click Create Playground button. Wait for sometime for your solidity playground to get setup.

1st area – In this we have our
- contract folder where we will create our solidity smart contracts.
- scripts folder where we will create our deployment file for our smart contract.
- test folder where we will create our test file to test our smart contracts.
- hardhat.config.js configuration file for hardhat.
You don’t need to worry about any other folder given, like preview, node_modules etc.
2nd area – This is our smart contract coding area where you will create your smart contract.
3rd area –This is our terminal for writing commands and if there are any compilation errors/warning in your smart contract, you can see them here.
4th area – In this area you will see an interface of your smart contract. (which we will see shortly)
Step – 5 : Now to use our solidity playground we need to install a metamask wallet. Link here.
Step – 6 : Now we need to configure the test network for our metamask wallet. Follow the steps given below.
- Open your metamask wallet. And select the circle (in top right).

- Select settings from the dropdown.

- Select Networks.

- Click Add Network button.

- An interface like this will open.

- Fill in the following details and click save.

- Once everything is done. You will have condedamn testnetwork in your metamask wallet.

Step – 7 : Now we need to import an account into our metamask wallet. Follow the given steps.
- Click on “connect wallet”.

- Select any account for now. And connect it. As we are going to import a new account in further steps.

- Once done. You will see your account balance and account address to the contract interface area.

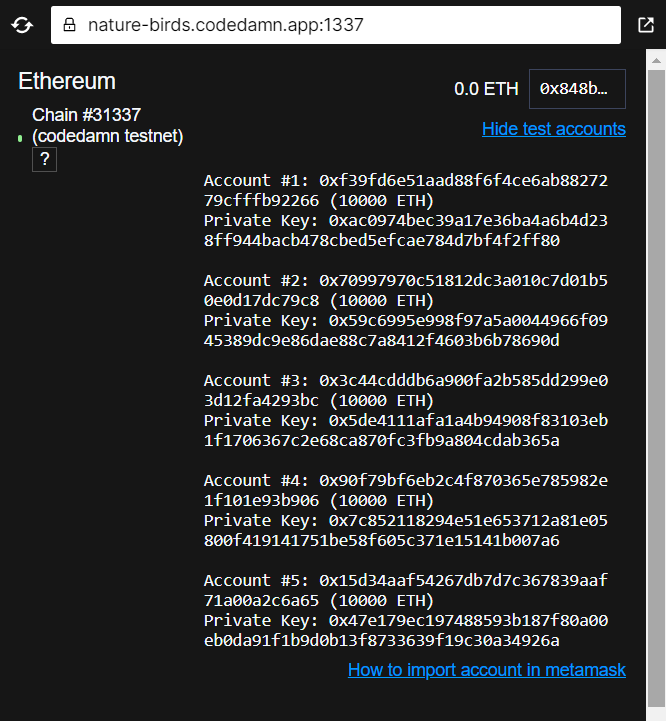
- Click on show test accounts.

- Copy the private key of one of the accounts which you want to import.

- Open your metamask. (Make sure you are connected to codedamn testnet).

- Click on the top right circle. And select import account option.

- Copy past your private key which we have copied earlier.

- Click on import. And you will see some fake cryptocurrency in your wallet.

Step – 8 : Now it’s time to connect our imported account to our contract interface. Click on the icon in the stop right.

- Now your contract interface will open in a new window. Now click your metamask to select the account you want to connect your contract interface with.

- Once connected, your contract interface will show the connected account balance and address.

- Now click on deploy.

- Confirm your transaction. And hurray! Your contract is deployed to the condedamn testnetwork.

I hope you enjoyed this tutorial. Play with the solidity playground and let me know your experience in the comment section below.
Thanks
Sharing is caring
Did you like what Kshitij wrote? Thank them for their work by sharing it on social media.
No comments so far
Curious about this topic? Continue your journey with these coding courses: